Both parts of the dress are finished! Well, the construction part anyway, I have plenty to do, and one order of business involves hemming both the slip and the overdress. The overdress will be particularly difficult because I’m not sure where to begin. I have to cut off a few inches and then how to hem see-through fabric? I know I’ll figure it out, but my brain is spinning right now. I also need to cut a few inches off the slip. But hemming it will be easier than the overdress.
I decided I was going to complete the slip on Saturday. I only had a few steps left and figured I would just get it done and not prolong the process. The first thing I needed to do was sew the lining fabric to the zipper tape. That wasn’t too difficult, except pressing a fold onto the fabric was easier said than done. The lining fabric is slippery, so ironing it takes about three or four hands. I finished that task, although I must say, it’s been a while since I hand sewed anything that long. While I was pinning the fabric to the zipper tape, I got to thinking about the lining hem (which is much shorter than the dress). I decided to pin it too, before pressing it. I must have used 50 pins. It probably would have benefitted me somewhat to actually press that fold too, but I didn’t.
I actually decided to tackle the armholes before hemming the lining. Once again, I was not too happy with the Burda pattern. The instructions didn’t make sense. It said something about pressing lining fabric strips lengthwise and then attach them to the hole. I had to read the instructions three or four times because it just wasn’t clear. I finally figured it out, but believe me, that isn’t the way I would have done it. I cannot even explain how tedious and weird it was to attach these thin strips to the armhole and then turn it. Fortunately, the whole thing is hidden, so no one will see it anyway. But honestly! I don’t remember anything so ridiculous years ago when I sewed regularly! It was a pain in the butt trying to hand sew slippery lining fabric to the armhole lining fabric. After that I had to hand sew the lining hem. I pressed everything as much as I could and called it a night.
At some point in the night (I dreamed about it), I decided I could finish the overdress. When I got up this morning, I pulled out the remaining pieces of fabric to see if I could actually fashion two sleeves out of it all. I also had to find the sleeve pattern piece. There is a pile of tissue paper pattern pieces and of course, they never go back into the envelope as easily as they come out. I think after the wedding, I will ceremoniously burn the entire tissue paper pile. Since I bought two of the same pattern, there is quite a lot. I also bought a Simplicity pattern with sleeves I actually liked better, so I found the sleeve pattern in that envelope and cut it out as well. Then I compared both patterns and found they were remarkably similar in size, but one is flared on the edges and the other is not. I used the Simplicity sleeves.
I had just enough fabric to cut out two sleeves. I’m telling you, it was close. Normally when you cut out fabric, you have to measure from the edge so you make sure it is with the grain or some such thing. Well, there is no grain on see-through tulle-like fabric. And the fake pearls are pretty randomly placed. I ended up putting the sleeves in pretty quickly. I followed my memory to ease them in so they fit perfectly.
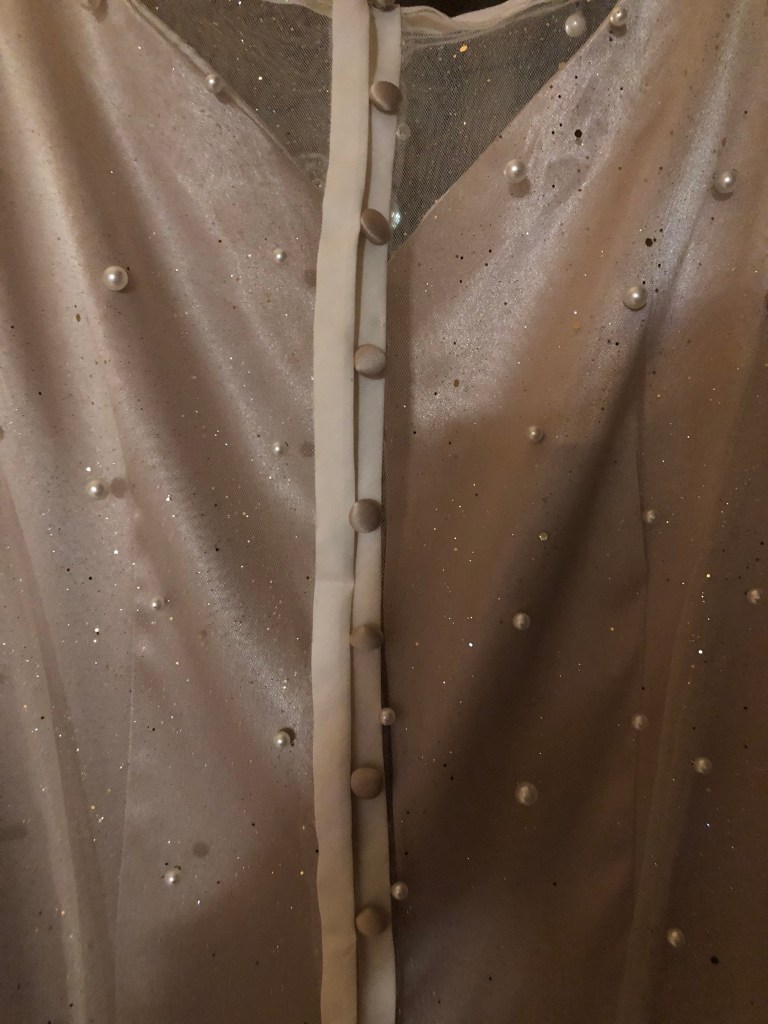
I had purchased some seam binding to finish the sleeve edges, the neck edge, and the back seam. After I finished with the sleeves and neck, I opened another package of seam binding and it was not the right thing. So back to the fabric store I went to find what I needed. It was a quick trip and I finished pinning the new seam binding to both edges of the back of the dress. After one side, I realized I needed to put a strip of elastic loops onto one side, so I pulled out all the pins and decided to sew the strip of loops onto the seam binding before I continued the hand sewing. Then I finished both sides of the seam binding. I bought some buttons that are about the same color as the slip. I’m going to attach a photo because I am particularly proud of this little detail.
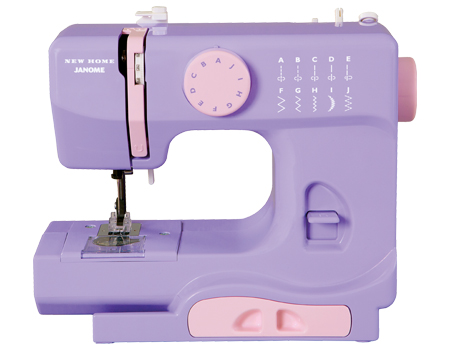
When I finally finished sewing on the buttons, I felt like I had conquered Everest! I actually cleaned up my sewing area and put my little Janome sewing machine away for now. On that note, I want to state that Janome could pay me to promote their little machines. I still cannot believe I sewed in an invisible zipper onto a wedding dress without a zipper foot and I did it twice! That little machine has been amazing. Easy to operate and actually does a decent job sewing all kinds of fabrics.
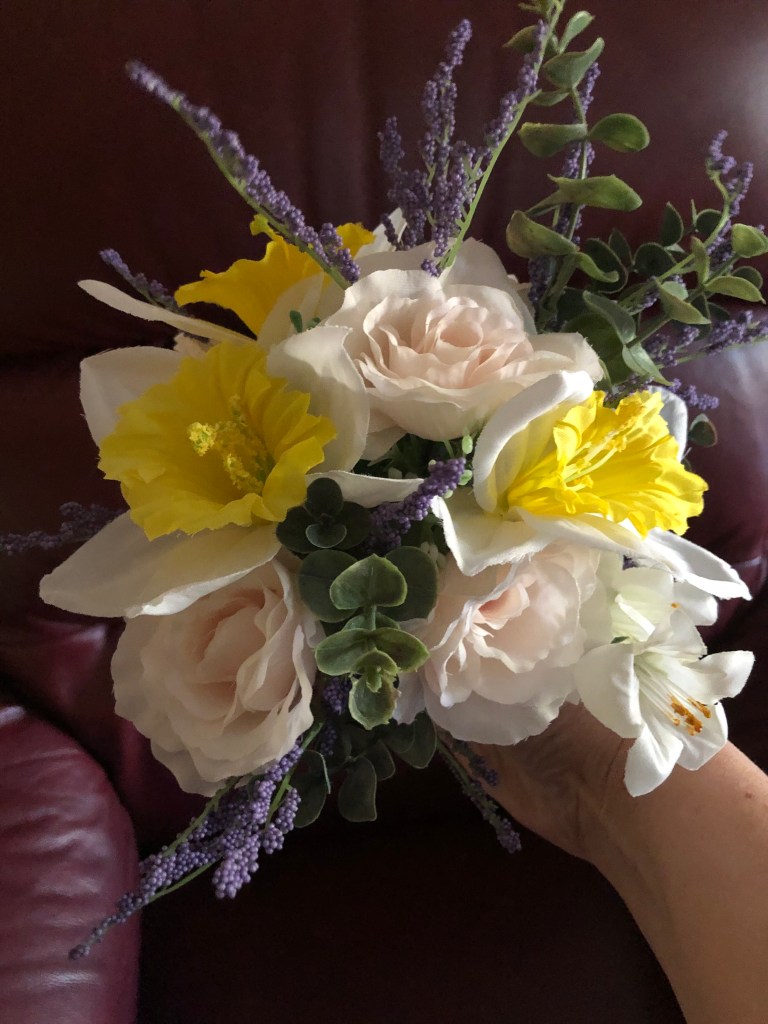
I decided perhaps I will retool this Blog to something about planning a wedding as well as making a dress. I thought about this as I decided to possibly do my own flowers. I’m looking at two relatively small bouquets and decided to see if I actually could do it. I practiced on fake flowers. I also found a bouquet I liked and decided to model my practice bouquet on it. Here are both. I really want yellow calla lilies, but Michael’s didn’t have calla lilies, so I got daffodils instead, which incidentally, are my favorite flower, but will be in low supply in August. A neighbor has tons of yellow calla lilies — I’m not sure when they are in season. I also want lavender, the plant, not the color. We have that in our yard. I didn’t think my bouquet was too bad for a first attempt. In the photo, it almost looks real!

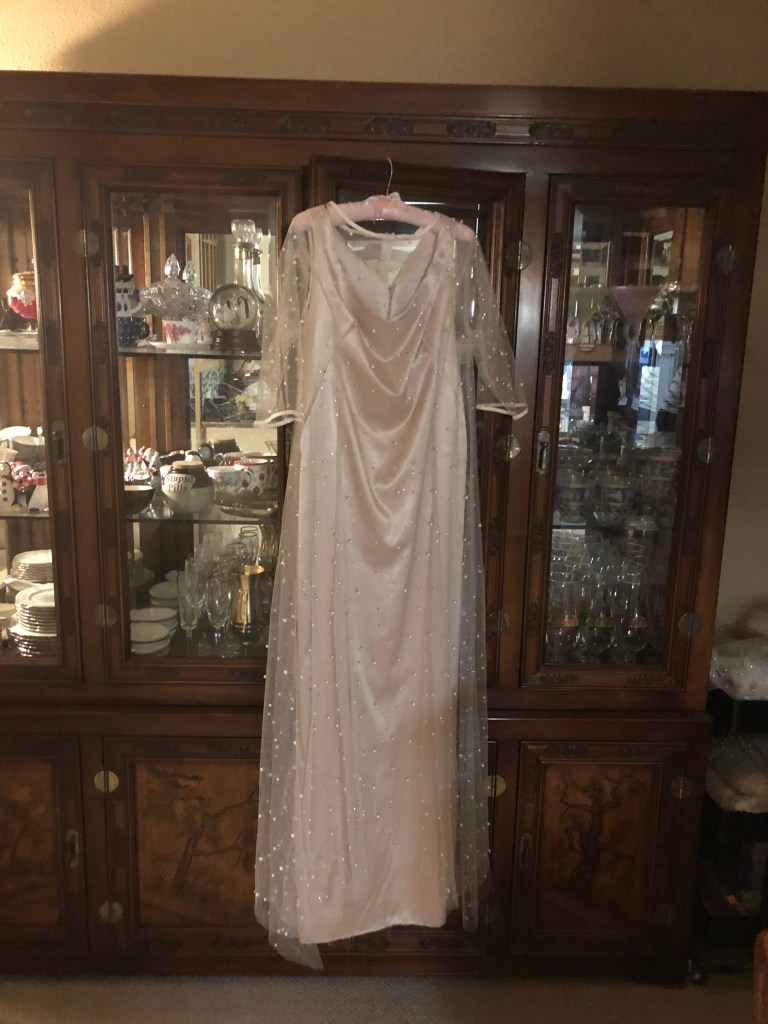
And here’s the dress…
And here’s one of me, just for fun…

That’s all for now. I am feeling inspired, but that will probably fade by tomorrow when I have to get up at 6:00 (really like 5:00) with DST starting and all. Happy sewing and planning. Stay safe and stay healthy!
